Configuring Token2 security key for PGP and SSH
A while ago I bought myself a pair of Token2 FIDO2 security keys – honestly I can recommend them, they’re great. They offer most of the same functionality as YubiKeys while being less than half the price, it’s really awesome.
For all that time though I’ve been massively underutilizing my keys, only setting them up for hardware-based 2FA and occasional passwordless login on those few services that allow it.
Not a long time ago I set up my own email server and started using new email addresses for different services, which prompted me to reconsider my use of PGP keys. This is where the idea was born to look at the on-device cryptography features of my Token2 keys.
Take a fair warning, this is going to be a long, comprehensive read about a lot of things you can do with PGP on your hardware token ^^
The Basics
Version of the key that I own (Token2 PIN+ Release3.3 USB-C) supports several OpenPGP algorithms including RSA4096 and ed25519, various embedded cryptographic algorithms and ecdsa-sk & ed25519-sk SSH keys. Support may vary depending on exact hardware revision and product type but in general, it should be more or less the same with any modern Token2 key.
In practical terms it basically means that in addition to FIDO2 functionalities, that Token2 key is also a PGP smart-card which is a solid basis for achieving two goals:
- Storing my PGP keys on the token itself so I can always have them with me on the go regardless of what device I use; and
- Using my token for SSH pubkey authentication for waow ultra secure remote access to very important things. I’ll be honest here, this is pretty overkill and in most situations this kind of setup will probably just end up getting in the way but I did it anyway just to have fun with it.
Using GPG to configure your keys
The tool I used for setting up everything on my token was the gpg binary from GnuPG suite and the embedded command-line interface.
Technically most of the same things can be done with standard OpenPGP and CCID combo but that approach felt more wonky and less out-of-the-box for me so I decided not to use it.
Usage of GPG for setting up a smartcard doesn’t seem to be documented very well and there are some things that are just left for you to figure out so I will try to do my best of describing the process here.
Let’s begin with reading some information about our token with the following command:
$ gpg --card-status
Reader ...........: 0000:0000:X:0
Application ID ...: 00000000000000000000000000000000
Application type .: OpenPGP
Version ..........: 3.4
Manufacturer .....: Token2
Serial number ....: 00000000
Name of cardholder: [not set]
Language prefs ...: [not set]
Salutation .......:
URL of public key : [not set]
Login data .......: [not set]
Signature PIN ....: forced
Key attributes ...: rsa2048 rsa2048 rsa2048
Max. PIN lengths .: 127 127 127
PIN retry counter : 3 0 3
Signature counter : 0
KDF setting ......: off
UIF setting ......: Sign=off Decrypt=off Auth=off
Signature key ....: [none]
Encryption key....: [none]
Authentication key: [none]
General key info..: [none]
Step 1: Change PIN
PGP smartcards use PINs (user and admin PIN) for confirming operations such as creation of keys, changes of data or signing stuff. These PINs are different from the FIDO2 part of your token and you set them up separately. It’s good to start by changing them.
Factory defaults:
- User PIN:
123456 - Admin PIN:
12345678
To do that, we need to enter GPG command-line interface on the token:
$ gpg --card-editAnd unlock admin-space commands:
gpg/card> adminThen proceed to the PIN management menu:
gpg/card> passwd
gpg: OpenPGP card no. 00000000000000000000000000000000 detected

1 - change PIN
2 - unblock PIN
3 - change Admin PIN
4 - set the Reset Code
Q - quit

Your selection?
Pick option 3, which will prompt you to change admin PIN. Then use option 1 to change user PIN, and Q to exit PIN change menu.
Step 2: Configuring cryptography
PGP on the token will generate 3 keys: primary Signing and Certifying key [SC], Authentication sub-key [A] and Encryption sub-key [E]. Default algorithm for all of these keys is rsa2048, which is a safe bet for compatibility with everything, but it’s definitely not the best modern option.
Command used to create keys will not prompt you to select algorithm, you need to select those first using the following command:
gpg/card> key-attrWhich will then prompt you to select algorithm and elliptic curve for each of the keys to be generated.
For a widely supported modern setup, pick ECC and Curve 25519 in every case.
Once that’s done you can run the following command to verify that changes have been made to your token’s configuration:
gpg/card> list

. . .
Key attributes ...: ed25519 cv25519 ed25519
. . .
Step 3: Generating keys
With that out of the way, we can actually generate our set of keys!
gpg/card> generateYou will be asked if you want to make an off-card backup of the encryption key.
For maximum security it’s best to select N, because the default action Y will save the key to your computer and then copy it to the token, defeating the purpose of storing keys in isolation on dedicated hardware.
But it also means that once the keys are generated they cannot be exported so no backup copy can be made. I describe an alternative procedure for creating an exact clone of two tokens in another section.
After that you will be prompted to authenticate with PIN and select standard options for your key such as expiration time and your identity. You will be able to change your UID or add more than one later on.
After picking all the options and accepting them, it’s done. Your Token2 security key now holds a set of PGP keys that you can use for all the standard things that these keys are used for, such as encrypting your emails, creating encrypted backup archives, signing git commits and many more. PGP is a beautifully standard solution in the computer world.
You can run the list command once more to verify that your keys have been generated correctly:
gpg/card> list

. . .
Signature key ....: A3D6 FF6F 7A89 3043 763F  5168 3AEB 1058 B661 2722
      created ....: 2026-07-23 18:32:29
Encryption key....: CB88 B08E CD20 8F68 EB05  5938 1F94 F58E 4B03 9FF8
      created ....: 2026-07-23 18:32:29
Authentication key: 4CD3 8306 5841 664A BE68  685A 3F40 606D 8586 A4F0
      created ....: 2026-07-23 18:32:29
General key info..:
pub  ed25519/3AEB1058B6612722 2026-07-23 test <test@example.com>
sec>  ed25519/3AEB1058B6612722  created: 2026-07-23  expires: never
                                card-no: 0000 00000000
ssb>  ed25519/3F40606D8586A4F0  created: 2026-07-23  expires: never
                                card-no: 0000 00000000
ssb>  cv25519/1F94F58E4B039FF8  created: 2026-07-23  expires: never
                                card-no: 0000 00000000
And the following command outside the GPG environment on your computer to verify that private key stubs have been correctly loaded into your local keyring:
$ gpg --list-secret-keys

. . .

sec>  ed25519 2026-07-23 [SC]
      A3D6FF6F7A893043763F51683AEB1058B6612722
      Card serial no. = 0000 00000000
uid           [ultimate] test <test@example.com>
ssb>  ed25519 2026-07-23 [A]
ssb>  cv25519 2026-07-23 [E]
Note the > symbol next to keys. It indicates that the keys is stored on a token, not on your computer.
Changes to that key can be made the standard GPG way of using gpg --edit-key KEY_FINGERPRINT command. That can be useful to add extra identities with different email addresses for example.
Step 4: Import keys on other computers
One thing that I noticed basically none of the guides on the internet is talking about is loading keys from your token into the local keyring so you can actually use them.
During initial key s setup public keys are imported and private key stubs are added to the keyring, but if you want to use the same already configured token on a different device or if you changed your operating system, you need to set a few more things to be able to do that easily.
GPG’s built-in card environment includes fetch command which does exactly that, but for it to work properly you need to configure a URL on the internet from which your public keys will be imported.
I genuinely don’t understand why this can’t be simply done locally since all the keys are literally there, but that’s the way it’s done 🤷 If I’m actually wrong here and there’s a better way, please let me know.
But alas, for this step you need to export your public key and put it online (which is fine! public keys are meant for sharing!). You can use a well-established public PGP key server such as keys.openpgp.org for example, but I just uploaded mine to my website.
Here’s a command to export your public key in a plaintext readable format:
$ gpg --export --armor KEY_FINGERPRINTOutput should look like this:
-----BEGIN PGP PUBLIC KEY BLOCK-----

xjMEamJjmBYJKwYBBAHaRw8BAQdAqTghyjm+5ajp71X4Z7wwfbVoD+dQllE5
uIh+y/gq3XHNF3Rlc3QgPHRlc3RAZXhhbXBsZS5jb20+wowEEBYKAD4Fgmpi
Y5gECwkHCAmQyhE0EsNnUPADFQgKBBYAAgECGQECmwMCHgEWIQRDMznItGnQ
7ciFoFPKETQSw2dQ8AAA/zUA/3tx7GNTsdR1VDAvu/+H6T4z05Iyx2Z1+vlF
/w71qFAUAP9y01ZJc0GT5PlpXcYUNaKnw9Ppviok3mu5GgLaigrIDM44BGpi
Y5gSCisGAQQBl1UBBQEBB0BWTiDR/eDmQzpalzQ2CiygNpPxDRtgHmsznHy/
SCurJQMBCAfCeAQYFgoAKgWCamJjmAmQyhE0EsNnUPACmwwWIQRDMznItGnQ
7ciFoFPKETQSw2dQ8AAAvgwBAMNi62VPYmYmcpGmzvK0kdFQKJXyjCbKl/Dd
6du6d1BXAQDazFUtOA1Zn8lK5YHZjoOL7xQZsyUIEl12WwQUxXd/Ag==
=WUWn
-----END PGP PUBLIC KEY BLOCK-----
You can either paste it into an online key server or save it as a file with .asc extension and host somewhere.
Once you do that, you can go back to the GPG environment on your key and set up key fetching:
gpg/card> url
URL to retrieve public key:
You need to enter a full URL from which your public key can be obtained, for me it’s going to be https://flufftech.net/pgpkey.asc.
And it’s done! You can set up some other extra settings that are mostly unimportant (such as name or salutation which are mostly used with an actual card-format smartcards) or type quit to exit the GPG shell, since you’re set up now.
Now when you connect your token to a new computer, you can import your keys into the local keyring in seconds by using this procedure:
$ gpg --card-edit
gpg/card> fetch
And your keys are ready to use.
Step 5: Setting up SSH key
An extra feature of this setup is that it you use your PGP key as your SSH key.
ed25519-sk or ecdsa-sk type keys with ssh-keygen, as that will generate a special type of dedicated SSH private key that uses FIDO functionality of your token to access. If you don’t want to use PGP features of the token or you have a FIDO-only U2F device without PGP support, that might be a great alternative for you!But since I have all my keys on the token, we’re going to use them together with gpg-agent to use them for SSH.
gpg-agent as your SSH agent. If you do, I’m sure you can figure it out.To do this, you need to edit your ~/.gnupg/gpg-agent.conf file and add the following config options to it:
enable-ssh-support
write-env-file
enable-ssh-support is pretty self-explanatory, it enables support for SSH keys in gpg-agent – it will automatically load SSH key from your PGP keys.
write-env-file is used to share agent information with other processes and sessions as a file so they can always access it.
Another option I really recommend you set up is pinentry-program, which will be used to help you with PIN/password prompts. On GNOME the best choice is /usr/bin/pinentry-gnome3, if you run KDE use /usr/bin/pinentry-qt.
If you use GNOME, there is a decent chance that GNOME Keyring will interfere with this so it’s best to disable the SSH agent feature of it. That’s usually done by stopping and disabling gcr-ssh-agent.socket and gcr-ssh-agent.service systemd units with systemctl command.
The last step is to reload gpg-agent:
$ gpg-connect-agent reloadagent /byeAnd set SSH_AUTH_SOCK env variable for your session.
I use fish shell so I added the following 2 lines into my ~/.config/fish/config.fish:
set -gx SSH_AGENT_PID ""
set -gx SSH_AUTH_SOCK "$XDG_RUNTIME_DIR/gnupg/S.gpg-agent.ssh"
If you use bash, add this into your ~/.bashrc:
unset SSH_AGENT_PID
if [ "${gnupg_SSH_AUTH_SOCK_by:-0}" -ne $$ ]; then
  export SSH_AUTH_SOCK="$(gpgconf --list-dirs agent-ssh-socket)"
fi
Make sure to reload your session for this to take effect.
Assuming everything worked out the way it should, this should be enough to automatically load SSH key from your token whenever you plug it in.
You can verify that by running this command:
$ ssh-add -L
ssh-ed25519 AAAAC3NzaC1lZDI1NTE5AAAAIFYX3suL5yb0099HU5jIz+ttx8Q8VMFRKtzLsrZu0ikX cardno:0000_00000000
If the output you see is similar to the above, with standard SSH key and a comment including your token’s serial number, it’s all good. If there’s nothing, it means something is wrong with the gpg-agent configuration to appending your SSH key into ~/.gnupg/sshcontrol file.
You can fix that manually by finding the keygrip of your [A] subkey from the token:
$ gpg --list-keys --with-keygrip
. . .
sub   ed25519 2026-07-23 [A]
      Keygrip = F635631A0BD254172DA068AED25E8C0B74BB40D5
Then add the keygrip value (here it’s F635631A0BD254172DA068AED25E8C0B74BB40D5) into ~/.gnupg/sshcontrol manually and reload the agent. That should do the trick.
Alternative key generation for token backup
As I mentioned before, generating keys on the token is safer, but has its downsides in the form or losing the ability to create backup of private keys. Oddly enough, GPG doesn’t let you know about this limitation.
Attempting to export your private key stored on a token with a command like this:
$ gpg --export-private-keys -a KEY_FINGERPRINT > private.keyWill result in an export of a private key stub which is effectively garbage. It really should result in an error instead but it doesn’t and this behavior can be really confusing.
A solution to this problem can be generating a set of keys locally on your computer and then copying them over to your token. In terms of security this is worse, as private keys aren’t isolated entirely inside the token, but this will let us have two tokens with the exact same set of keys for backup.
Step 1: Temporary keyring
For this process we will create a temporary GnuPG home directory in our computer’s RAM so none of the sensitive data makes it to storage.
Let’s start by verifying that local /tmp directory is actually on physical hardware RAM. It usually is but now always.
$ df -h
. . .
tmpfs            12G   21M   12G   1% /tmp
If you see a line like this including tmpfs next to your mounted /tmp directory, you’re good to go. If it’s anything else, stop right here and get yourself a tmpfs working directory for this purpose.
So now we can switch GnuPG to a temporary working space:
$ export GNUPGHOME="$(mktemp -d)"And verify it succeeded by running:
$ gpg --list-secret-keysIt should be empty
$GNUPGHOME override is specific to your currently open shell, avoid doing any of those operations in a different shell session from now on.Step 2: Local key generation
Now let’s create our keys:
$ gpg --full-generate-keyFollow the usual options for key generation, with the default ECC (sign and encrypt) & Curve 25519 combo being a good option. GPG will be very unhappy with you when you decide to make a key without a password, but for this purpose it’s actually okay to do it this way since key on the token will be protected by PIN for all sensitive operations.
The default key generation process creates only [SC] primary key and [E] encryption subkey. We have to create an additional [A] authentication subkey manually:
$ gpg --expert --edit-key KEY_FINGERPRINTOnce in expert edit mode, let’s add a subkey:
gpg> addkey
Please select what kind of key you want:
   (3) DSA (sign only)
   (4) RSA (sign only)
   (5) Elgamal (encrypt only)
   (6) RSA (encrypt only)
   (7) DSA (set your own capabilities)
   (8) RSA (set your own capabilities)
  (10) ECC (sign only)
  (11) ECC (set your own capabilities)
  (12) ECC (encrypt only)
  (13) Existing key
  (14) Existing key from card
Your selection?
Select 11. The default will be a signing [S] subkey.
Possible actions for this ECC key: Sign Authenticate
Current allowed actions: Sign

   (S) Toggle the sign capability
   (A) Toggle the authenticate capability
   (Q) Finished

Your selection?
First select A to allow authenticate, then S to disable sign feature. Then Q to save.
Select the default Curve 25519 curve, your preferred expiration and skip setting a password again.
Output should look like this:
sec  ed25519/8BC55E989F30E234
     created: 2026-07-23  expires: never       usage: SC
     trust: ultimate      validity: ultimate
ssb  cv25519/CA1E4DF2A5758FEB
     created: 2026-07-23  expires: never       usage: E
ssb  ed25519/DF08FED94A66B8FB
     created: 2026-07-23  expires: never       usage: A
[ultimate] (1). test <test@example.com>
Step 3: Moving keys to the token
Now we can begin copying our keys to both tokens.
A few notes:
keytocardcommand can only move one key or subkey at a time, so for each token you need to use it 3 times.- Be careful to not use
savecommand before all keys are moved to both tokens, as it will remove the locally stored key afterkeytocardcommand it used. - After adding keys to the first token, swapping tokens will confuse GPG and it will not be able to do anything. Use
quitcommand and re-enter the--edit-keyenvironment.
Moving primary key:
gpg> keytocard
Really move the primary key? (y/N) y
Please select where to store the key:
   (1) Signature key
   (3) Authentication key
Your selection?
Select y and then 1
To move the [E] subkey first copy it’s fingerprint from the list, then select it:
gpg> key E_SUBKEY_FINGERPRINT
gpg> keytocard
Please select where to store the key:
   (2) Encryption key
Your selection?
Select 2
Now to move the [A] subkey you first need to un-select the previous key, select [A] key and only then you can proceed:
gpg> key E_SUBKEY_FINGERPRINT
gpg> key A_SUBKEY_FINGERPRINT
gpg> keytocard
Please select where to store the key:
   (3) Authentication key
Your selection?
Select 3 and type quit
Verify that all keys have been moved:
$ gpg --card-status
. . .
Signature key ....: E6F9 C957 0C88 42FA 0BE7  8FE5 8BC5 5E98 9F30 E234
      created ....: 2026-07-23 20:53:48
Encryption key....: 30C7 7655 B800 09A2 7C18  7BBB CA1E 4DF2 A575 8FEB
      created ....: 2026-07-23 20:53:48
Authentication key: A187 B940 5D19 F956 0D6F  3C81 DF08 FED9 4A66 B8FB
      created ....: 2026-07-23 21:03:39
General key info..: pub  ed25519/8BC55E989F30E234 2026-07-23 test <test@example.com>
sec   ed25519/8BC55E989F30E234  created: 2026-07-23  expires: never
ssb   cv25519/CA1E4DF2A5758FEB  created: 2026-07-23  expires: never
ssb   ed25519/DF08FED94A66B8FB  created: 2026-07-23  expires: never
If the output looks something like this, congrats, the move has worked!
You can now swap the tokens, re-enter --edit-key environment and repeat the exact same procedure.
fetch functionality on the token before you delete local copy of all keys because otherwise --full-generate-key can import private key stubs from token but only one at a time. Using fetch grabs them all.Once you’re done doing that, you can actually quit edit environment using save, which will remove local copy of all affected keys.
Wow that was pretty long
If you reached this far wow I’m proud of you, you’re such a massive nerd, you deserve a medal 🏅
I have a few words to end this post with, mostly that it was a really interesting journey that tought me some cool things and overall made me more comfortable with handling PGP keys. It was definitely worth it and I sincerely recommend you play with it yourself.
A bonus piece of information I have for you is that this entire project was much funnier for me considering that the entire time I’ve been setting up cryptography stuff on my collar :3
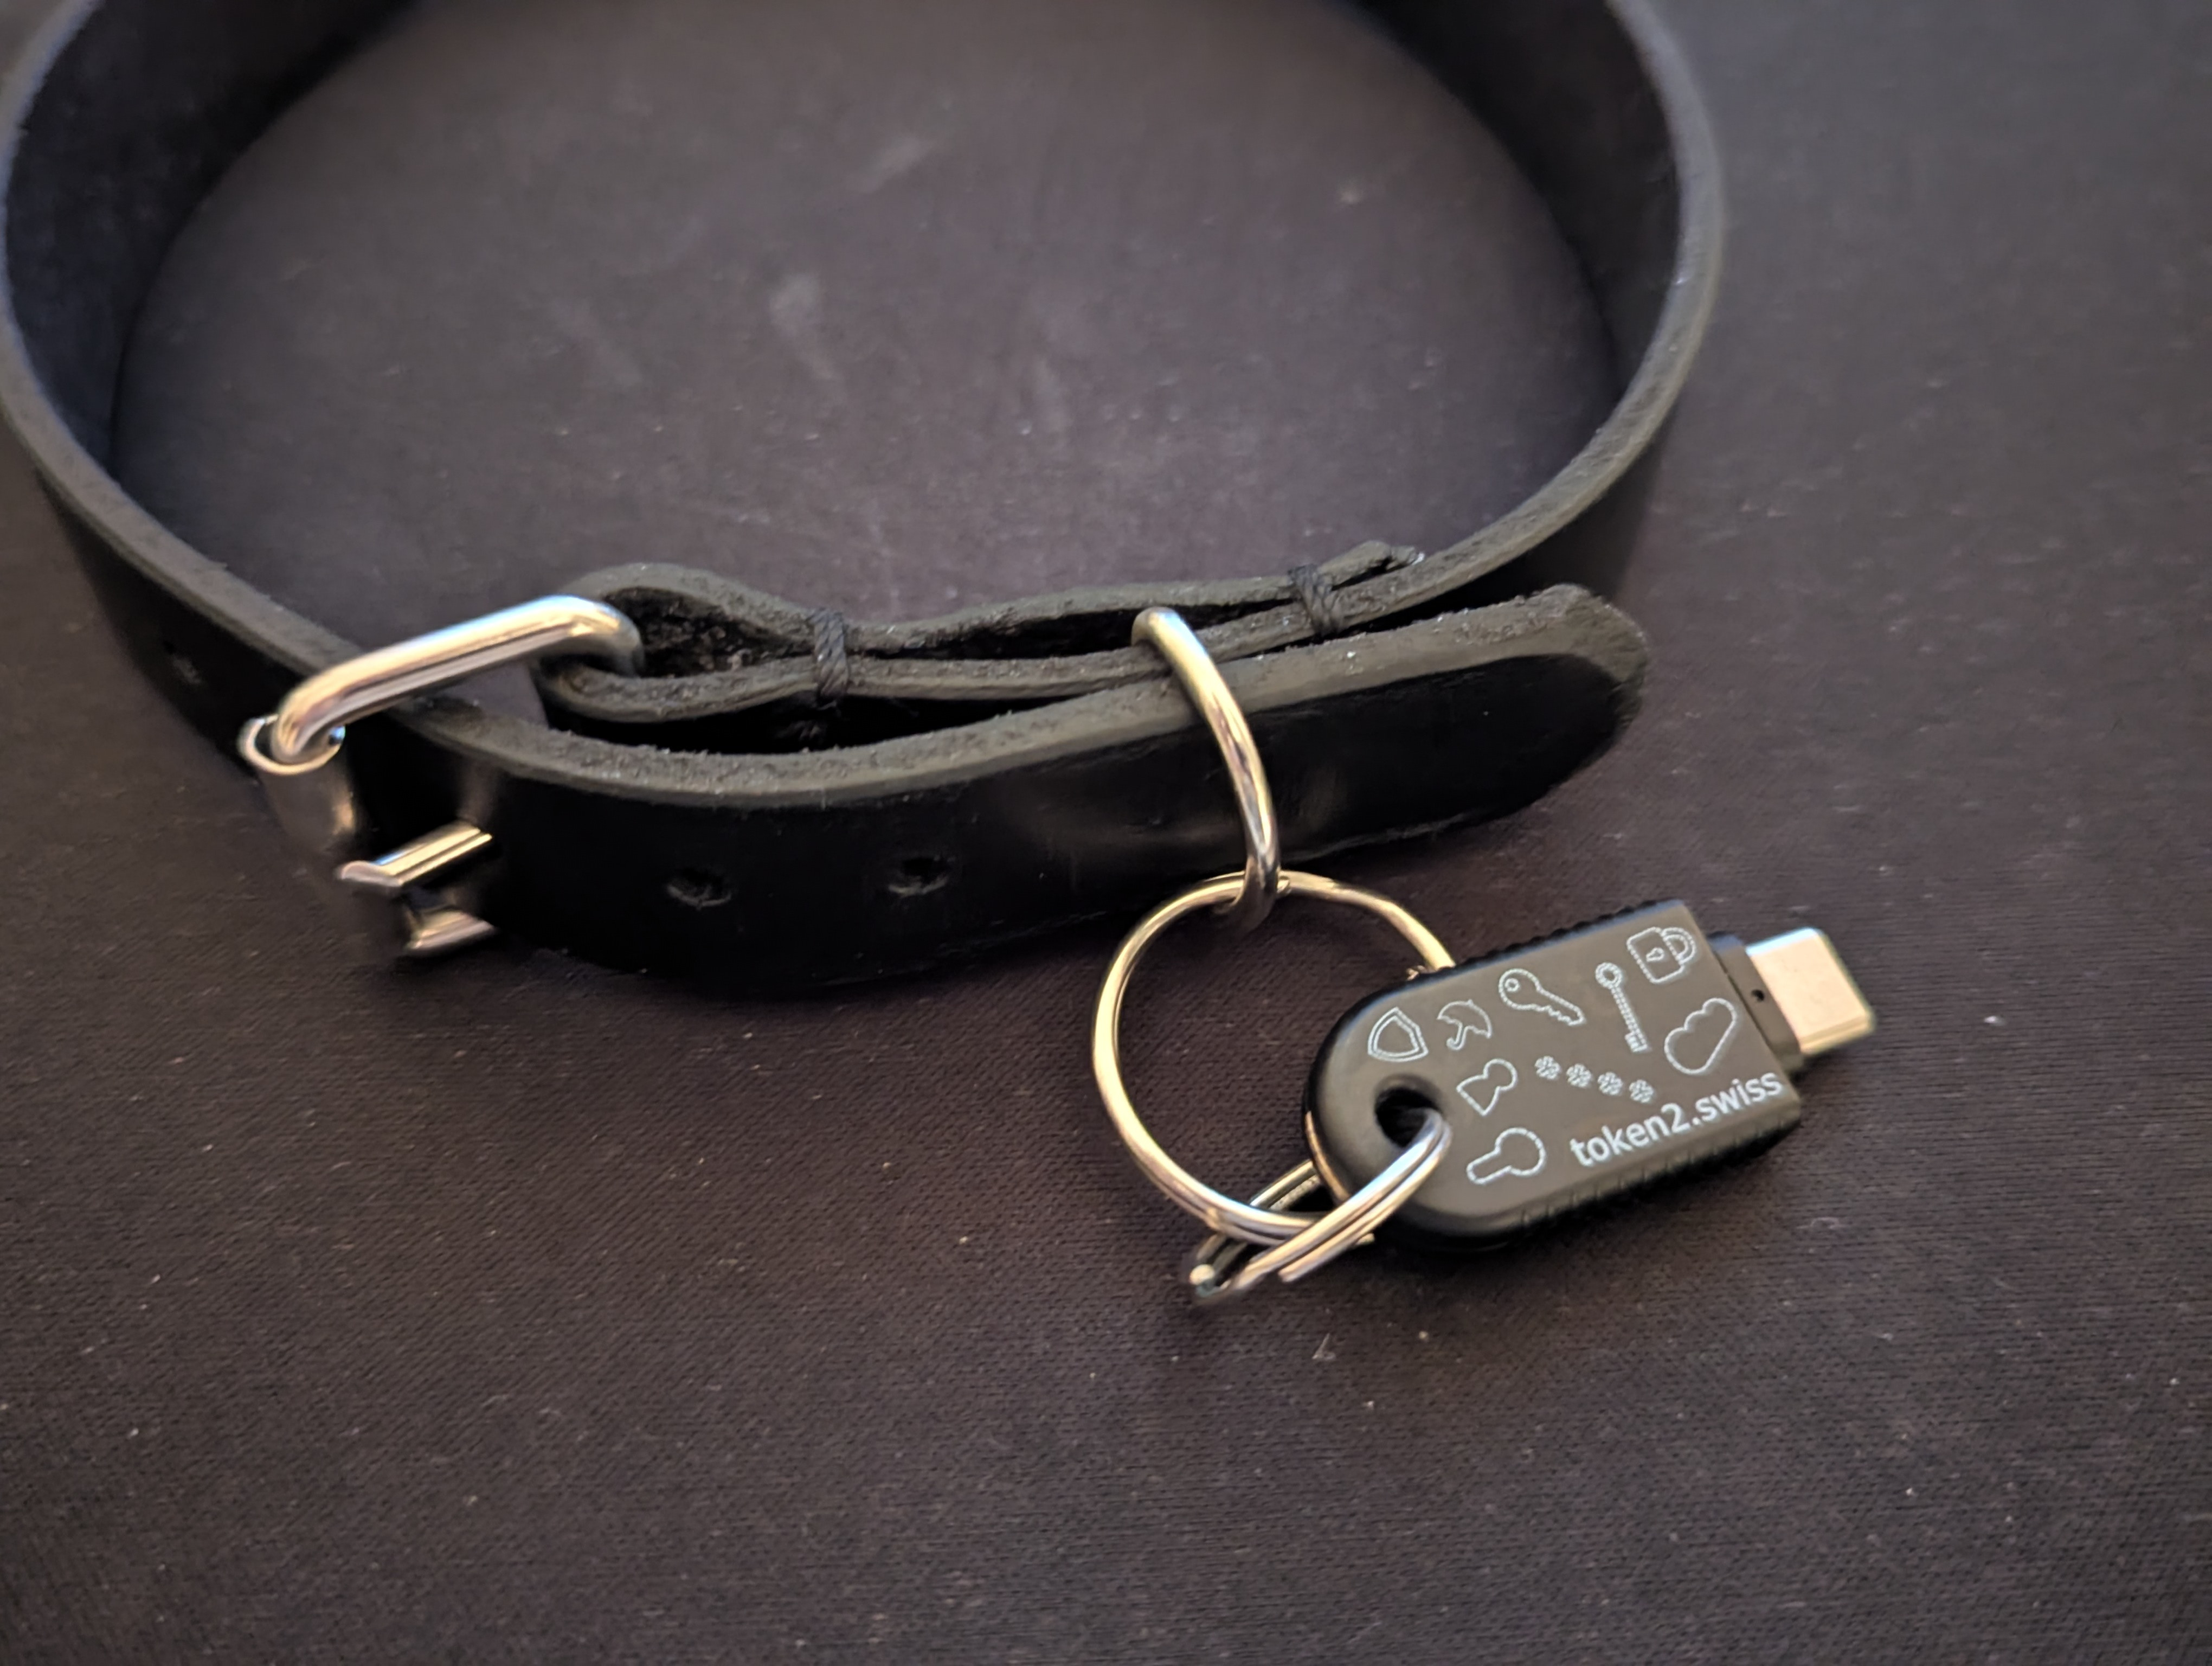
Now I literally can SSH into my servers with my collar and it’s genuinely perfect.
If you have any questions or want to share your thoughts, feel free to send me an email or reach me on the Fediverse ^^